

Monday, 31 July 2017
Garden of Dreams
Inspired by Dounia Large's post in this fortnight's paperartsy dark to light challenge, I decided to have a go at pulling the inks through from a dark to light layer like she did. I started with a piece of black card and sprayed some dylusions inks on to it. When that had dried I painted over the ink with some eggplant fresco paint. When that was finally dry I cut it into 2 pieces and on one piece used a stencil and some modelling paste to create the latticed background and on the other I stamped some Lynne Brown paperartsy stamps in white gesso. As you can see both mediums pulled the inks through from the layer below but I love the almost tiger-print pattern I got on the leaves and flower from the gesso. It was harder to stamp the sentiment with gesso as it kept running into the crevices but I used a white gel pen to create 'shadows and it looks better IRL than it does in the photo but it had to do as I didn't have anything else light to stamp it with. I then finished it off with some metal springs which you can just see if you look carefully!


Friday, 14 July 2017
Bright bold colors
Being a teacher my year starts in the middle of August so I just bought a new planner ready. This one has a plastic cover where you can put your own cover so I decided to make one using some of the practise backgrounds I made with my new dylusions inks. I had lots of inky shimmery fun!
Ingredients: dylusions sprays funky fuschia and after midnight
paperartsy frescos haystack, amethyst and bora bora
Jofy stamps
sakura gel pen
white posca pen
donna downey stencil
distress oxide spiced marmalade
cosmic shimmer mist
light molding paste
Ingredients: dylusions sprays funky fuschia and after midnight
paperartsy frescos haystack, amethyst and bora bora
Jofy stamps
sakura gel pen
white posca pen
donna downey stencil
distress oxide spiced marmalade
cosmic shimmer mist
light molding paste

 |
| A close up to better see the shimmer |
Wednesday, 12 July 2017
Paperartsy Aqua Challenge
I bought some new craft goodies yesterday, mainly dylusions inks and distress oxides, so I decided to spend the evening trying them out and decided that the challenge - Aqua - over at Paperartsy at the moment would be perfect.
I started off by blending cracked pistachio and broken china distress oxides on some white cardstock. Then I sprayed some polished jade dylusions through a paperartsy stencil but I didn't really get the effect I wanted so I went back over the stencil with some more broken china ink. I quite like the halo effect it's given to some of the circles. I then stamped with some turquoise archival straight onto the background with some free stamps from a magazine. I'd found these adorable wooden pieces when I was craft shopping and thought they'd be perfect; the branch is painted with stone and claret frescos for a pop of colour. The bird was painted with claret, crackle and mermaid but it didn't really work so I overheated the paint with my heat tool so it bubbled then added some patina guilding wax over the surface. The sentiment is from the Dina Wakley stamp set scribbly birds.
I had lots more fun making backgrounds last night so will hopefully have a few more projects to show in the near future!

Monday, 10 July 2017
Lavinia Landscapes
The challenge over at Lavinia stamps this month is landscapes so I thought I'd have a go. I started with the sky using distress inks and I was really impressed with it (I'm terrible at blending distress inks!) but then when I tried to do the land it all went a bit wrong so I kept the sky but painted over the land with Paperartsy fresco paints. I then sprayed the sky with glimmer mist through a Tim Holtz stencil to get the rays as the sun sets and finished off with a few Lavinia stamps in archival ink. It's been so long since I last did any stamping the inkpad was starting to dry out - oops! An excuse to buy some new craft goodies perhaps?!

Sunday, 2 July 2017
Fairy door - free digi image
Hmm, it's been a while since I last blogged! I have been crafting kinda sporadically the last couple of years, partly due to lack of space and partly due to working too much. Now it's the summer holidays and with lots more free time on my hands I got struck by the crafty bug again :) I'd been scrolling pinterest and decided to do some fimo/sculpey sculpting and make a fairy door. I must admit, 3-4 year old fimo is NOT the easiest thing to use!! It took rather a long time to work the clay so that it was useable. Here's the finished product:

I've also been playing around with drawing digi images so I decided to make this into a digi to practise. Feel free to download and use the following image - I think right clicking should work, otherwise leave a message here or DM me your email address on twitter and I'll send it across (I'm @emscraftcorner). If you do use it, I'd love to see what you make with it!


I've also been playing around with drawing digi images so I decided to make this into a digi to practise. Feel free to download and use the following image - I think right clicking should work, otherwise leave a message here or DM me your email address on twitter and I'll send it across (I'm @emscraftcorner). If you do use it, I'd love to see what you make with it!

Happy crafting!
Tuesday, 30 December 2014
Natalie and Amy's Challenge - All things new
It's time for a new challenge over at Natalie and Amy's and this month's theme is 'All Things New'. This was a bit of a challenge for me as I've just moved house and found that everything I wanted to use was packed in a box somewhere. It took me nearly half an hour just to find the plates for my big shot - no idea why I hadn't packed them together!
Anyway, I went for new stash for this one as I don't need any new house/baby/year cards at the moment (I'm good at building a stash of unused cards!)
I used:
New 6x6 card blanks (so hard to get here, my mum brought me a packet when she came over a few weeks ago)
Authentique paper
Co'redinations card
Don and Daisy Winter stamp
Darice embossing folder
New Crafters Companion Die'sire fence
New Nellie Snellen Trees
New snowflake embellishments
Sunday, 30 November 2014
Natalie and Amy's Challenge - Cute and Cuddly Christmas
It's time for another challenge over at Natalie and Amy's and this month the theme is cute and cuddly Christmas.
Here is my creation:

First Editions paper (don't know the name)
Memory box snowflake corner
Coloured with promarkers.
Friday, 31 October 2014
Natalie and Amy's Challenge - Stitch It!
Things have been very busy for me lately; as well as starting a new job I've also had a couple of exams and am in the process of buying a flat so haven't had much time for crafting. Unfortunately I think it's likely to stay that way until the new year when I finally get my new flat and all my crafty goodies shipped over from England and unpacked :)
Here is my offering for this month's Natalie and Amy's challenge which is 'Stitch It'.
The image on this card is actually one I created myself. It's coloured with promarkers but unfortunately my printer ink didn't like them very much so it smudged a little. I'm not sure what to do because I'd really love to use more digis but they just smudge if I print them on decent card and if I don't use decent card then the promarkers bleed - can't win!!
All the paper is from First Editions New Bloom
(Apologies for the blurry picture, unfortunately it's getting to that time of year again when it's impossible to photograph in natural daylight.)
Saturday, 4 October 2014
Natalie and Amy's October Challenge - Colour on Kraft

I used In the Wild from Stamp It Australia and First Editions summer breeze paper. The lion is coloured with normal colouring pencils and the brads were coloured with a gold promarker.
Sunday, 14 September 2014
A bit late for Natalie and Amy's challenge this month - oops!
I completely forgot to post this a couple of week's ago for Natalie and Amy's September challenge 'Things with Wings'. It was an absolute nightmare to photograph so I gave up and then forgot that I hadn't posted it. Then my computer refused to upload it and then I couldn't find it once I finally managed to upload it! Finally, here it is...

Things from Natalie and Amy's
Local King Peacock rubber stamp
Wednesday, 30 July 2014
Natalie and Amy's July challenge - die cuts and flowers
Time for another challenge over at Natalie and Amy's and this month it's to use die cuts and flowers. Please pop over and take a look and join in. As always, there's a great prize up for grabs.
I thought I'd have a play with some acetate for this card, something I've not done before and I'm pretty happy with the result although I need to work out how to stop it bending quite so much.

I took a 6 x 6 card blank and used the Memory Box Cosmo Border right at the fold. I then cut a piece of acetate to 6 x 6 and embossed it with the Spellbinders Lovely Lattice M-bossabilities plate and stuck it in place with some double sided tape. I used a Spellbinders Labels die to cut out the shape for the sentiment and stamped the words from Sheena Douglass - Silhouette Grasses. The flowers are Joy! die cuts and the branches are CC Designs and they are fixed with white brads topped with diamond stickles on top.
Monday, 30 June 2014
Natalie and Amy's challenge: Summer
It's time for a new challenge over at Natalie and Amy's and this month our theme is Summer. Hopefully summer is on it's way soon; it's been fairly warm here but still a bit rainy and chilly at times. Here is my card.

Ingredients:
Stamp-It Australia - Dragonfly delights
First Editions - Summer Breeze
StazOn Brown
Creative Expressions Pearls
Lace
Doilies
Thursday, 26 June 2014
Unicorn card
Hello! I just got back from a wonderfully relaxing week at the West Coast of Sweden. The weather was good, just a bit of rain, and I learnt to fish, shoot, row a boat and celebrated my first midsummer in Sweden. Next week will be a bit different as I have three essays to write for my Swedish course but before getting started on those I decided to make a card instead...

I made this card using the technique for this month's craft stamper challenge which is called bleach blocking. I covered a piece of card with spiced marmalade, vintage photo and walnut stain distress inks then with a wet distress pad lifted the colour in the four panels to create a window. I really liked how it left some of the colour and made it look like ground. I masked off the area around the 'window' and added a little tumbled glass distress ink and stamped the unicorn from Lavinia Stamps. I wanted a little bit more depth to the card so added the kaisercraft crackle stamp to make it look like a very old wall, then finished off with the personal impressions sentiment and some beaded trim.
Friday, 20 June 2014
PaperArtsy sneak peak
I was very excited when I was asked to do a post over on the PaperArtsy blog. I love seeing all the different projects every week which are a little outside of my usual style and push me to try new things.
Here is a sneak peak of my project - if you want to see the whole thing hop on over to the PaperArtsy blog.

Here is a sneak peak of my project - if you want to see the whole thing hop on over to the PaperArtsy blog.
Saturday, 14 June 2014
More Gelli plate fun

I made this card for my sister's birthday using my gelli plate for the background and range of PaperArtsy stamps and paints.
To make the background I experimented with the technique I've seen Barbara Grey do several times on Create and Craft where you stamp layers onto the gelli plate and leave them to dry in between. The first try was a disaster but the second one worked much better!
Then I took a kraft tag and painted it with frescos and a baby wipe. I really like the effect that it created. I heat embossed the sentiment with gold pearl WOW powder.
The leaves, flower and border I stamped onto remnants from other gelli plate pulls and then cut everything out and stuck it together. I finished it off with a bit of curled wire and the gorgeous butterfly brad which I've had in my stash for ages and didn't want to use :)
Thank you for looking!
Friday, 6 June 2014
One man and his dog

Here is a birthday card I made recently using this gorgeous stamp from Lili of the Valley. It was such fun to colour and I loved how the wall turned out although I cut most of it off!
I would like to enter this card into the following challenges:
LilioftheValley - Male or Sporty
Saturday, 31 May 2014
Meerkats and my voyage into the world of creating digi images
Over the past few months I've been dabbling with creating digi stamps from hand drawn images based on a few commissions. I've really enjoyed doing this but was finding the editing quite laborious and couldn't quite get the look I wanted, that is until I discovered a fabulous free piece of software called Inkscape last week so I've spent many hours playing and experimenting over the past few days and I'm much happier with what I can achieve. I am hoping that I can start to make digis on a more regular basis and maybe eventually sell them (once I've worked out how the Swedish tax system works :-/ ).
Here is my first attempt, a very simple meerkat as requested by my nan. I purposely left the fur smooth as I thought I could create the furriness by letting the colour bleed outside the lines (very rare to do that intentionally!!). This one is coloured but if you would like to download a free plain version click on the Digi Stamps link at the top of my blog.

Here is my first attempt, a very simple meerkat as requested by my nan. I purposely left the fur smooth as I thought I could create the furriness by letting the colour bleed outside the lines (very rare to do that intentionally!!). This one is coloured but if you would like to download a free plain version click on the Digi Stamps link at the top of my blog.
Friday, 30 May 2014
Natalie and Amy challenge - Four legged friends
Hello! This month's challenge over at Natalie and Amy's is Four Legged Friends. The stamp I've chosen is definitely four legged but maybe not a friend unless you want your hand bitten off but I love the look of this animal and I'm not much of a dog/cat person so I'm using some artistic licence :)

I made the card with Spiced Marmalade, Fired Brick and Walnut Stain Distress inks roughly blended onto card before stamping the Stamp-It Australia tiger with brown archival ink. I drew on the stripes with a gold promarker and backed it with some green glitter card. Finally I added a tiny bit of diamond stickles to the eyes, just to match with the glitter card.
I made the card with Spiced Marmalade, Fired Brick and Walnut Stain Distress inks roughly blended onto card before stamping the Stamp-It Australia tiger with brown archival ink. I drew on the stripes with a gold promarker and backed it with some green glitter card. Finally I added a tiny bit of diamond stickles to the eyes, just to match with the glitter card.
Thursday, 22 May 2014
UTEE flowers
Summer has finally arrived (and is hopefully here to stay!) here in Sweden and I've been busy working and studying so haven't had so much time for crafting and I've been making some wedding invites too so less time for personal crafting. I suddenly realised that my I haven't posted anything here for a couple of weeks so thought I better rectify that.
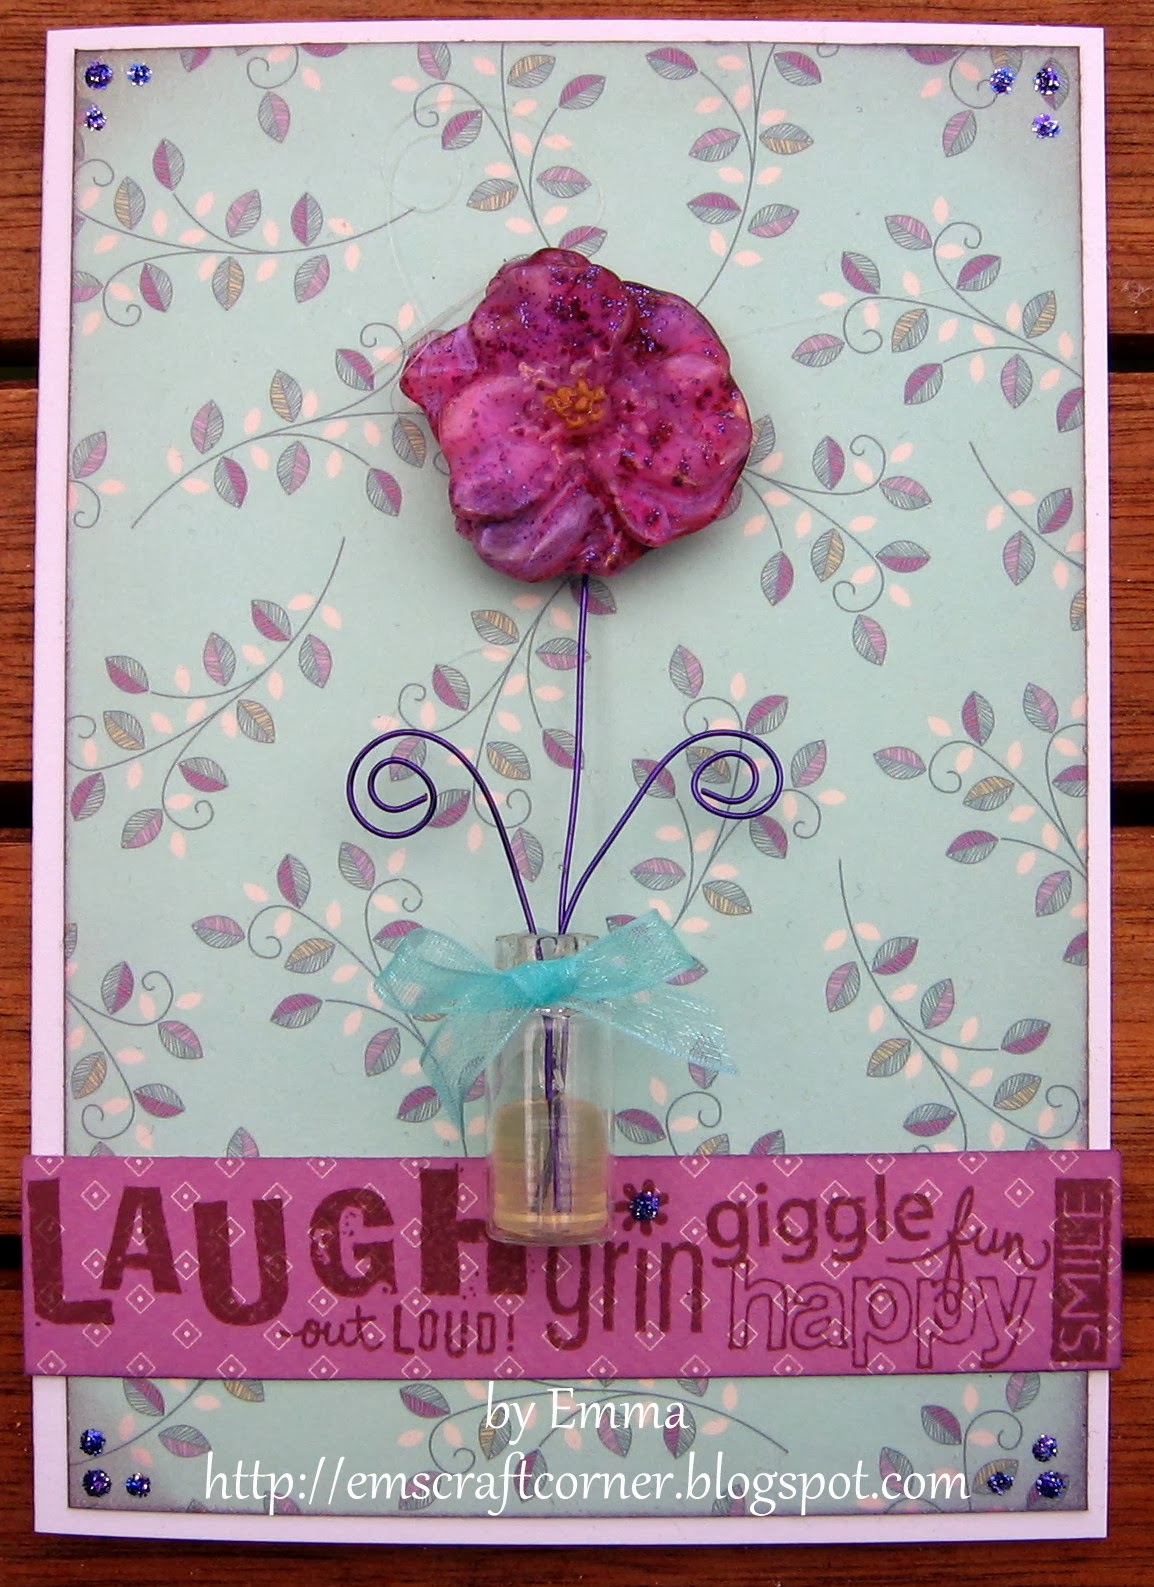
Here is a card I made for mother's day a few weeks ago. The flower is made from a mixture of UTEE and two different shades of purple embossing powder poured into a flower mold. I coloured the centre with a gold promarker. I also poured a small amount of UTEE into the glass vial and stick the wire in while it was still hot so they set. I didn't really like the stickles in the corners, I probably should've used rhinestones instead but never mind.
Wednesday, 30 April 2014
Natalie and Amy's challenge - rubber stamping
Time for the next challenge over at Natalie and Amy's and this month it's rubber stamping.

I made this card for my cousin's twelfth birthday. He loves skiing and skating so I thought this was a very apt image. He is a Marianne Design stamp called Don and Daisy Winter. I coloured him with Cool Grey 1 - 5 promarkers and a touch of black. I created the hills with a piece of torn paper and some very dead black distress ink a la Barbara Gray and then brayered the sky with the same dead ink. The trees are from woodware and stamped in black versafine. I created the Polaroid simply by cutting a square out of a piece of white card and edging it with strips of black card.
Subscribe to:
Posts (Atom)